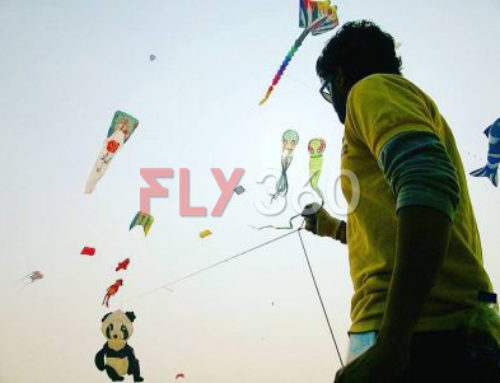
Kites are the classic childhood toy that we have fond memories of. Nothing is more exciting than flying a kite on the cool breezy day. Kite making is a simple and practical craft that one can enjoy constructing. Flying a kite made by your own hands will make you smile!
With a few household materials, kite making is a simple and fun procedure. So let your creativity soar. With help of few instructions mentioned below one can make a kite sitting at the house.
Steps Of How To Make A Simple Kite
Step 1: Get your material
The material required to make a kite at home are
- An enormous strong plastic bag.
- A roll of electric tape.
- Two thin hardwood rod, at least as long as the plastic sheet.
- A roll of nylon knitting yarn or some other light but strong synthetic thread, such as a fishing line.
- A piece of wood or cardboard for the winder.
Step 2: Collect your tools
The basic tools required by beginner can all be found at home.
- A ruler.
- A Scissors.
- A black marker pen.
- A carving knife.
Step 3: Sketch your kite
Lay your plastic bag smoothly down on a flat surface, with the opening at the bottom. Mark three dots on the bag: one in the very top-left corner (closed end), a second on the left edge 100 cm down from the first dot, and a third 25cm down from the top and 50 cm in from the left edge.
Using the ruler, draw a straight line from dot one across to dot three, then back down and across to dot two. The dots should form an uneven triangle.
Flip the bag over, and on the reverse side trace over the original pen line to make a matching triangle shape. Carefully cut along the top and left-hand edge of the bag. Open it out to a form a large flat sheet which will now have a recognizable diamond kite shape marked out.
Click here to know more about Kite Making Workshop
Step 4: Cut the kite sail
Cut out your diamond carefully with the help of the scissors. Please make sure only adult person uses the scissor. Save the remaining plastic bag.
Step 5: Build the kite structure
Take one wooden rod and lay it at the center of your kite shape from top to down. Cut the extra length so that it is exactly the length of the kite. Cut a roughly 5cm piece of tape to affix each end of the wooden rod to the plastic. Tape along the length of the wood and fold the tape over a little at the top and bottom to firmly secure it.
Take a second piece of the wooden rod and lay it from the left to right corners of the kite shape, to form a ‘t’ with the first piece. Adjust the length and tape exactly as you did before.
Step 6: Attach the thread
Turn the kite over and, using the end of the scissors, poke a small hole in the plastic where the two wooden rods meet. Thread one end of your thread through the hole and firmly tie it to both pieces of wood, add some tape to the middle of the knot to make sure it is firmly in place.
Tie the other end of the line to a small wooden block or piece of board that you can hold comfortably.
To make this handle, a strip of cardboard long enough to hold with both hands and slice a slit in the middle on both sides. Stick the end of the thread in one of the slits so that it doesn’t move as you wind the thread around.
Step 7: Make the tail
From the remaining pieces of a plastic bag, make a long, narrow tail for your kite. The tail should be around 5cm wide and about twice as long as your kite.
You might need to tape pieces together and may need to use a second bag if you don’t have enough left over. Tie the tail to the bottom of the longer length of a wooden rod, just above where it is taped to the plastic.
I tried this with my 8-year-old son last weekend and it was such a wonderful activity! The instructions were very clear and easy to follow. Our kite flew on the very first attempt which made him so proud. Thank you Fly360 for making this accessible for beginners — we will definitely try more complex designs next!
I tried this with my 8-year-old son last weekend and it was such a wonderful activity! The instructions were very clear and easy to follow. Our kite flew on the very first attempt which made him so proud. Thank you Fly360 for making this accessible for beginners — we will definitely try more complex designs next!
I tried this with my 8-year-old son last weekend and it was such a wonderful activity! The instructions were very clear and easy to follow. Our kite flew on the very first attempt which made him so proud. Thank you Fly360 for making this accessible for beginners — we will definitely try more complex designs next!
As a primary school teacher in Munich, I am always looking for hands-on STEM activities for my class. This kite-making guide is perfect — it combines geometry, aerodynamics, and creativity in one simple project. My class of 25 students made their kites and flew them in the school grounds. The joy on their faces was unforgettable!
As a primary school teacher in Munich, I am always looking for hands-on STEM activities for my class. This kite-making guide is perfect — it combines geometry, aerodynamics, and creativity in one simple project. My class of 25 students made their kites and flew them in the school grounds. The joy on their faces was unforgettable!
Simple, practical and fun! I used this guide for a summer camp activity in Indore and all 30 kids aged 6-12 completed their kites successfully. The step-by-step approach with the materials list was especially helpful. Would love to see a version using recycled materials for eco-conscious crafting!
Simple, practical and fun! I used this guide for a summer camp activity in Indore and all 30 kids aged 6-12 completed their kites successfully. The step-by-step approach with the materials list was especially helpful. Would love to see a version using recycled materials for eco-conscious crafting!
As a primary school teacher in Munich, I am always looking for hands-on STEM activities for my class. This kite-making guide is perfect — it combines geometry, aerodynamics, and creativity in one simple project. My class of 25 students made their kites and flew them in the school grounds. The joy on their faces was unforgettable!
What a wonderful resource! In Senegal, kite flying is popular among children in coastal areas but most families cannot afford store-bought kites. This DIY guide using simple household materials is exactly what communities here need. I translated the key steps into Wolof and shared it with our local community centre. Big impact from a small tutorial!
What a wonderful resource! In Senegal, kite flying is popular among children in coastal areas but most families cannot afford store-bought kites. This DIY guide using simple household materials is exactly what communities here need. I translated the key steps into Wolof and shared it with our local community centre. Big impact from a small tutorial!
Used this guide for a Forest School session in Yorkshire — the kids built their kites from materials collected in the woods and then flew them on the moor. Brilliant blend of traditional craft and outdoor learning. The science behind why kites fly was a great teachable moment too. Bookmarked for our annual spring session!
Used this guide for a Forest School session in Yorkshire — the kids built their kites from materials collected in the woods and then flew them on the moor. Brilliant blend of traditional craft and outdoor learning. The science behind why kites fly was a great teachable moment too. Bookmarked for our annual spring session!
Simple, practical and fun! I used this guide for a summer camp activity in Indore and all 30 kids aged 6-12 completed their kites successfully. The step-by-step approach with the materials list was especially helpful. Would love to see a version using recycled materials for eco-conscious crafting!
What a wonderful resource! In Senegal, kite flying is popular among children in coastal areas but most families cannot afford store-bought kites. This DIY guide using simple household materials is exactly what communities here need. I translated the key steps into Wolof and shared it with our local community centre. Big impact from a small tutorial!
During the lockdown, this article was a lifesaver for keeping my kids engaged at home. We made four kites over two weekends and it turned into a family tradition. My daughter now wants to design her own kite patterns. Thank you Fly360 for inspiring creativity in young minds!
During the lockdown, this article was a lifesaver for keeping my kids engaged at home. We made four kites over two weekends and it turned into a family tradition. My daughter now wants to design her own kite patterns. Thank you Fly360 for inspiring creativity in young minds!
Used this guide for a Forest School session in Yorkshire — the kids built their kites from natural materials and then flew them on the moor. Brilliant blend of traditional craft and outdoor learning. The science behind why kites fly was a great teachable moment. Bookmarked for our annual spring session!
During the lockdown, this article was a lifesaver for keeping my kids engaged at home. We made four kites over two weekends and it turned into a family tradition. My daughter now wants to design her own kite patterns. Thank you Fly360 for inspiring creativity in young minds!
Je travaille dans une école primaire à Lyon et cet article est une véritable pépite pédagogique! The balance between being simple enough for young children yet educational enough to spark curiosity about flight is perfect. We paired this with a lesson on the Wright Brothers and it was magical. Sharing this with the whole staff!
Je travaille dans une école primaire à Lyon et cet article est une véritable pépite pédagogique! The balance between being simple enough for young children yet educational enough to spark curiosity about flight is perfect. We paired this with a lesson on the Wright Brothers and it was magical. Sharing this with the whole staff!
Je travaille dans une école primaire à Lyon et cet article est une véritable pépite pédagogique! The balance between being simple enough for young children yet educational enough to spark curiosity about flight is perfect. We paired this with a lesson on the Wright Brothers and it was magical. Sharing with the whole staff!